Zendesk is a terrific web-based helpdesk. And with the CheckMarket online survey tool you can automatically create a Zendesk ticket based on a survey response. For this we have separate type of survey notification.
There are several interesting uses for this action.
For instance, you could ask a respondent in a survey if they would like to be contacted and if so have a ticket created in Zendesk so that your customer support staff can call them.
Another use might be if a respondent indicates that they are very unhappy or are planning to stop using your services, you could have a ticket created so that someone in your organization contacts them to win them back, maybe with some kind of interesting offer.
Setting up this kind of alert is easy to do. First go to your survey in the tool.
- Click on Settings and then on Notifications.
- Click on
 to add a new notification.
 - Enter the conditions.
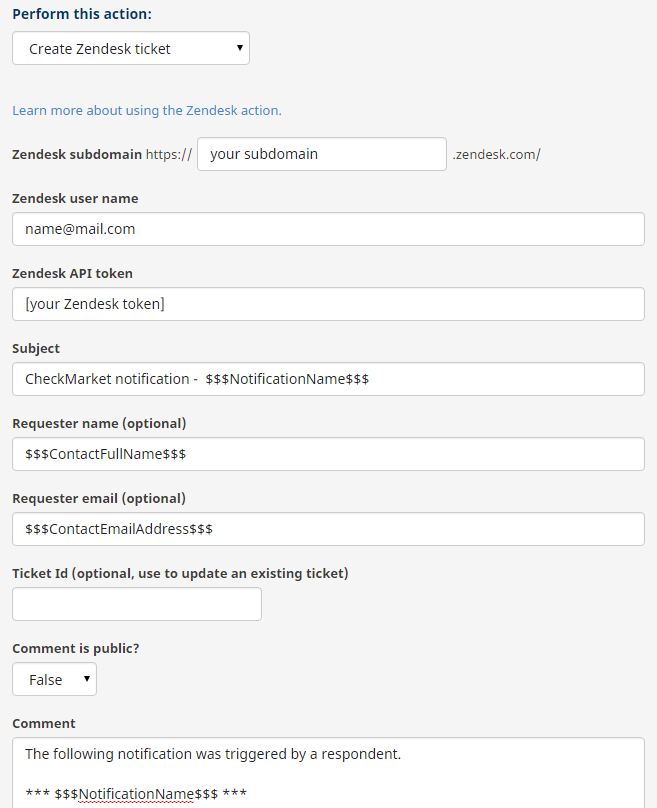
- Select the action Create Zendesk ticket.
- Enter your Zendesk subdomain: https://-{subdomain}.zendesk.com
- Enter your Zendesk username.
- Enter your Zendesk API token. You can find this in Zendesk under Admin > Channels > API)

- Enter the subject of the ticket
- Enter the optional requester name. You can also use a variable.
- Enter the optional requester email. Here, too, you can use a variable.
- Fill out a Ticket Id. This field only needs to be filled out when you wish to update an existing Zendesk ticket. If you leave this field empty, a new ticket will be created every time this notification is triggered. Again, you can use a variable so that this field is personalized per respondent.
- Select whether you want to add a public comment or not. Public comments are visible to the requester, whereas as private notes aren’t.
- Add the comment text.
- Your notification screen now looks something like this:
- Click on Save.
When you’re done, test the notification by going through a preview of the survey. Don’t forget to delete the test ticket that is created.
Leave a Reply