CheckMarket’s ReportBuilder is a powerful tool to create shareable reports and dashboards for your surveys. Along with all that power comes some complexity. It is worth taking a few minutes to understand the major zones of the ReportBuilder, some key concepts and its terminology.
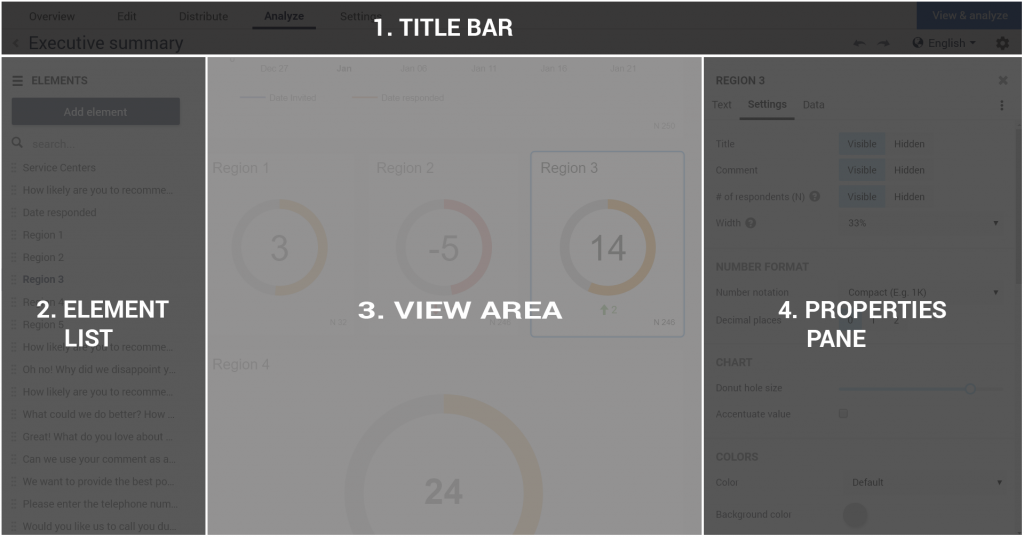
Let’s start by taking a look at the interface which is divided into four main zones:
- Title bar: Shows the name of the report, undo/redo buttons and a menu that contains settings that affect the entire report.
- Element list: This area on the left is a table-of-contents. Each item in the list stands for an element or building block that makes up your report.
- View area: This area shows you what the report will look like. You use this area to select an element that you would like to edit.
- Properties pane: This area on the right, is where you can adjust all the settings for your report and elements.
Now, let us take a look at each zone in detail.
Title bar

This strip that stretches across the screen holds several functions:
- The “<” sign takes you to the list of reports for the survey.
- Report title
- Multilevel undo and redo buttons: Clicking the undo button will undo the last action, and clicking the redo button will redo the undone action. It is multilevel, so you can click several times on the undo button to undo the last changes you made to the report.
- The current language of the report (only appears if report is in more than one language).
- The cog wheel opens settings that affect the entire report. These settings apply to all report elements but can often be overridden at the element level.
- The View & Analyze button opens the viewer to actually look at the report you built.
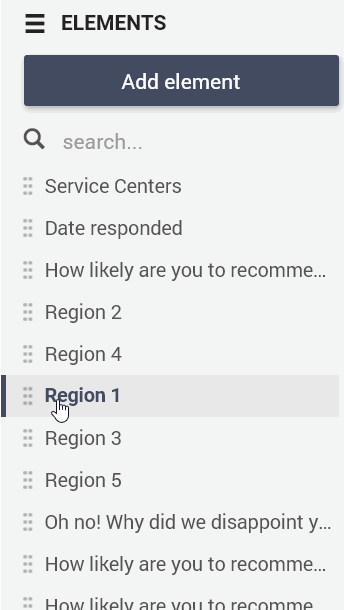
Element list
One of the key aspects to understand about the ReportBuilder is that it is made up of elements. Each element is a building block that has a type, such as pie chart or cross-tab, and one or more data sources (question or contact field).
The table of contents on the left, shows a list of all the elements (blocks) that make up your report. You can use the drag icon to the left of each element to drag and drop them to change the order the elements appear in the report. The hamburger icon at the top lets you hide or display the list.
The name of the element is usually the title of the element, but if that is too long, you can also add a short name to an element to be used in the list without changing the title.
You can select an element by clicking on it in the list which will scroll to it in the view area and open its properties pane on the right. If you have a lot of elements, you can search for an element by typing part of its name in the search box at the top of the list.
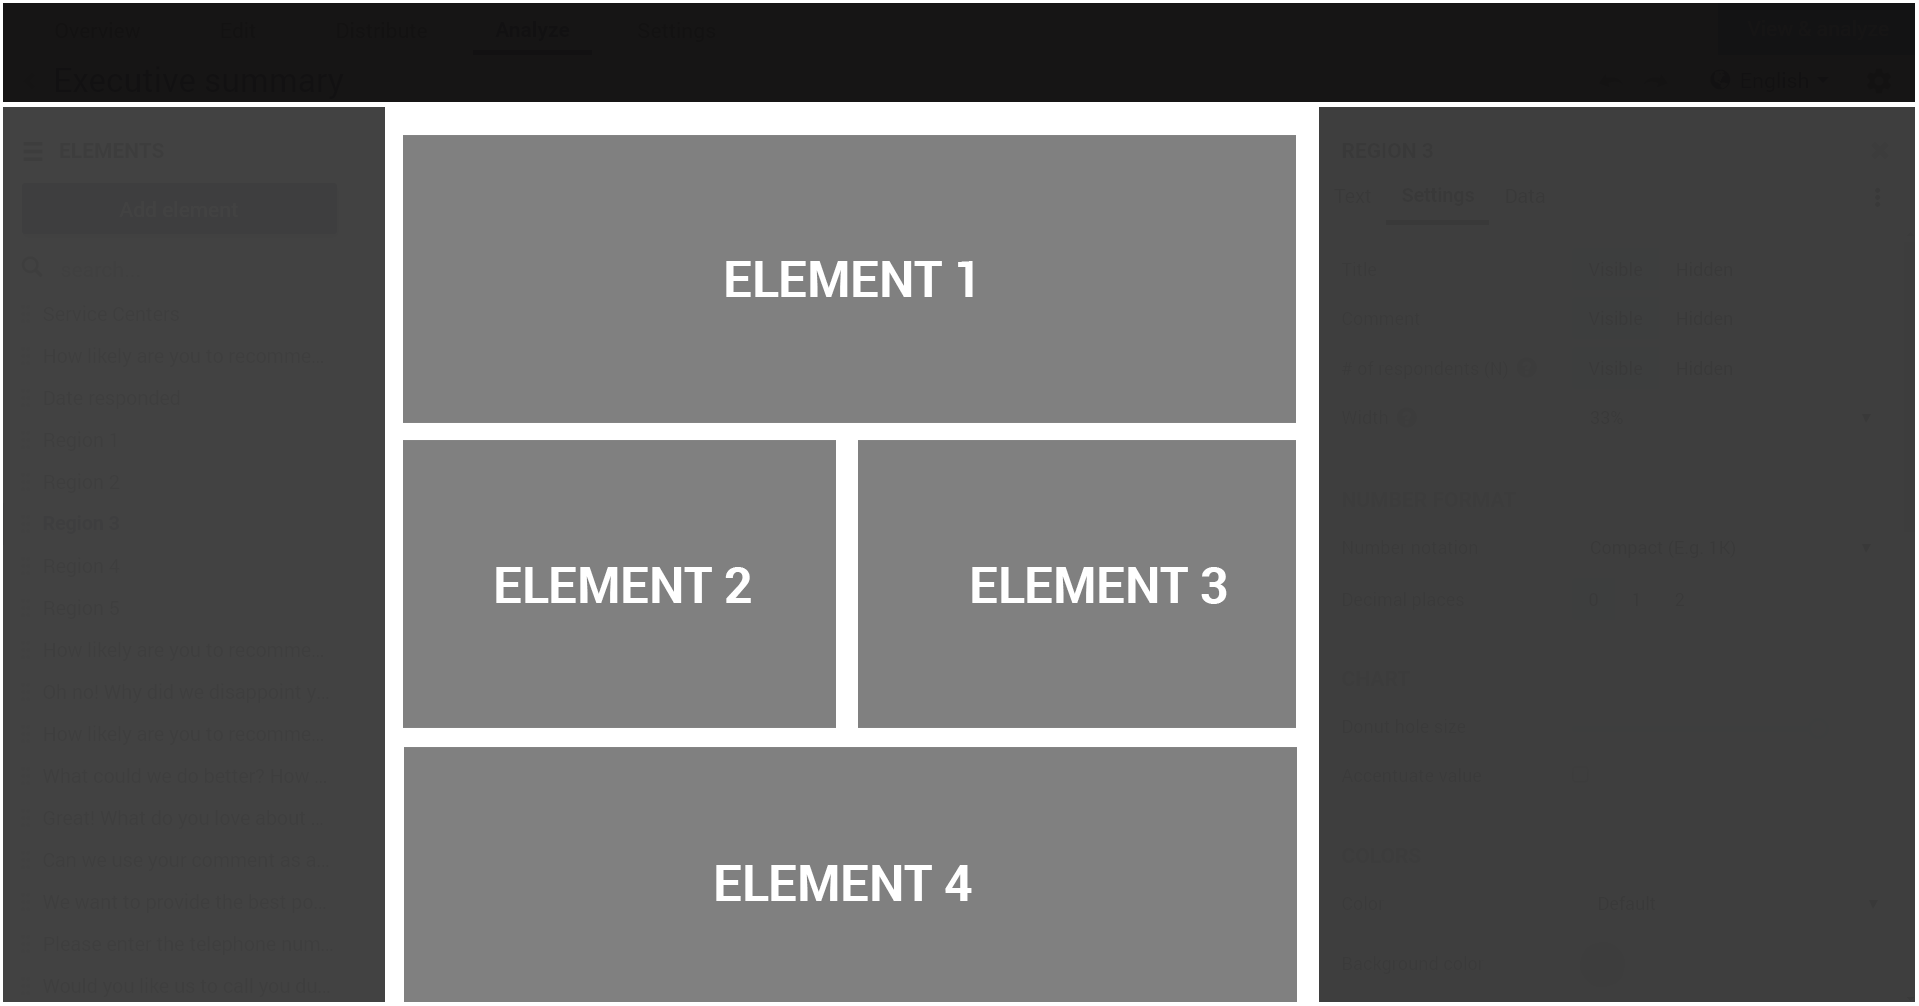
View area
The view area shows you what the report will look like when it is viewed. It is not very interactive in the builder itself. You can click on an element to select it and open its properties pane on the right. The selected element has a blue border around it.
Most elements take up the entire width of the report, but it is possible to place some elements next to each other by setting their width to less than 100%.
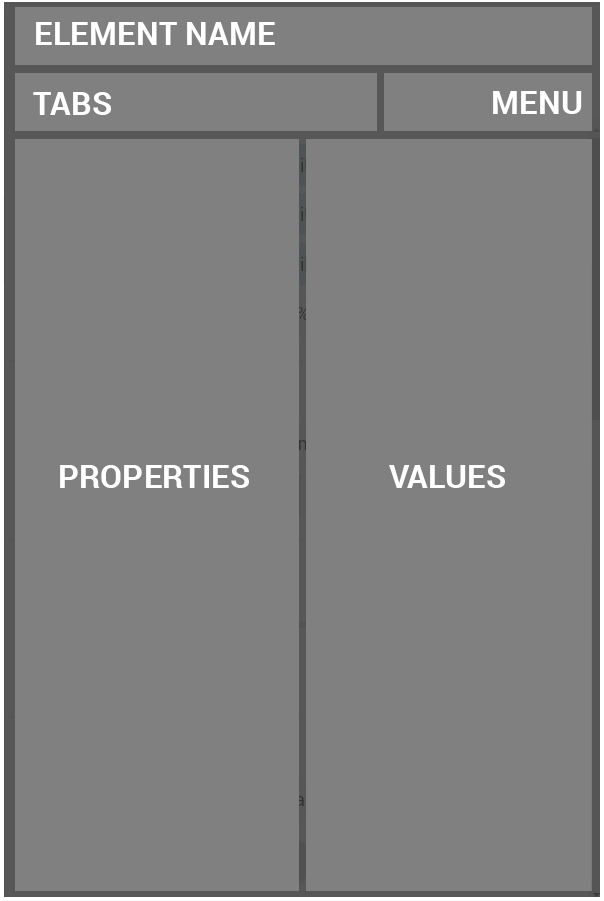
Properties pane
The properties pane is the most complex area of the ReportBuilder. The content changes depending on which type of element you are working on or if you are working on the report options which affect all elements.
At the top is the name of the element you are editing and an ‘X’ to close the properties pane.
Below that are some tabs that group properties together.
Next to the tabs is a ![]() menu. The options in this menu only affect the current element.
menu. The options in this menu only affect the current element.
Each tab is divided into logical sections with the name of the property on the left and the value on the right.
The exact workings of the different properties and settings are covered in other articles.
Tip: Check the top of the properties pane to see what you are editing. If you are editing report level properties, it will say so. If you are editing the properties of an element, it will show the title of the element and the element will have a blue border around it in the view area.
Where’s the ‘save’ button?
There is no ‘save’ button. All changes are saved immediately. There is an indicator to the right of the report title in the title bar that lets you know if your changes have been saved. If you make a mistake, just click on the ‘undo’ button.
Next steps
Our help center has a special section on the ReportBuilder. Most articles are short and handle a specific function. There is also a lot of inline help in the ReportBuilder itself. Look for the small circles with question marks in them. When you hover over them, extra information will appear.
Leave a Reply