The respondents overview provides information on your survey respondents, such as their completion level, time needed to complete your survey, etc. If contacts responded to your survey, you’ll be able to find back the contact metadata in this overview as well.
Via the respondents overview you can do a myriad of things, such as consult individual respondent reports, remove responses from your survey, edit responses, etc.
Opening the respondents overview
- Sign in to CheckMarket.
- Open your survey.
- Click on Analyze and then on Respondents.
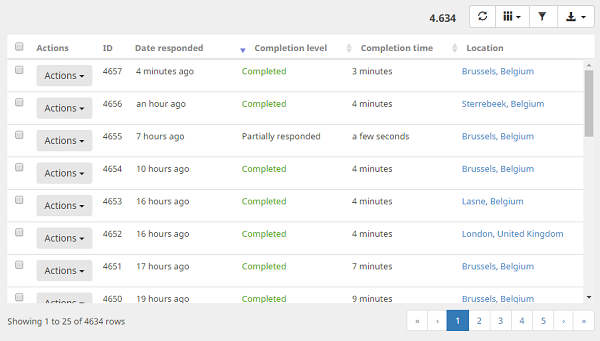
The default respondents overview is now visible.
You can refresh the respondents overview at any time by clicking on ![]() . This way you’ll always have the most up-to-date list available.
. This way you’ll always have the most up-to-date list available.
Adding or removing columns
By default only the following columns are visible:
- ID: the respondent ID. The earlier a respondent provided his response, the lower this number will be.
- Date responded: hover over the date to see the exact date and time.
- Completion level: if a respondent hasn’t finished their survey yet, the completion level will be set to Partially responded.
- Completion time: how long did they spend filling out your survey? Hover over this figure to see the exact time in seconds.
- Location: the location of the respondent based on their IP address.
- Actions: additional actions you can take for each respondent (more info below).
Click on ![]() to see the list of available columns. Select or deselect any columns you wish to add or remove to the respondents overview. Any changes are immediately visible.
to see the list of available columns. Select or deselect any columns you wish to add or remove to the respondents overview. Any changes are immediately visible.
Please note that some data, e.g. custom fields, first name, last name, … will only be visible if the respondent is also a contact AND you have imported this information into your account.
Filtering
Click on the funnel ![]() to open the filter options.
to open the filter options.
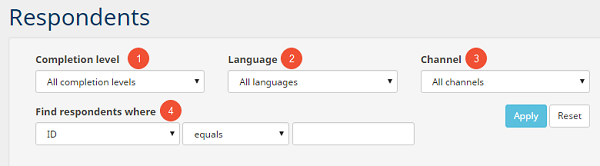
(1) Completion level: view only respondents that completed the survey, only the ones that partially responded or view all respondents.
(2) Language: filter by available survey language.
(3) Channel: see only those respondents who were invited via a certain channel. Only those channels that apply to your specific survey will be visible.
(4) Find respondents where: filter on any contact field that you’ve imported: email address, location, country, any custom field, etc. If you haven’t used contacts you can still filter on date responded or ID.
Click on Apply to activate the selected filter(s).
Downloading the raw data
Click on ![]() to download the survey’s raw data in Excel, SPSS (fully labeled) or CSV format. All active filters will be taken into account.
to download the survey’s raw data in Excel, SPSS (fully labeled) or CSV format. All active filters will be taken into account.
Consulting individual respondent reports
Click on Actions next to the respondent and click on Report to open the individual respondent report.
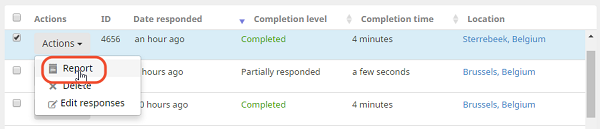
Or select multiple respondents and click on the Report button to see all the selected respondents’ reports in 1 simple overview.
You can then download the respondent report(s) as a single PDF file.
Editing responses
Click on Actions next to the respondent and click on the “edit responses” icon. A new tab will open showing the survey including all selected answers for that respondent.
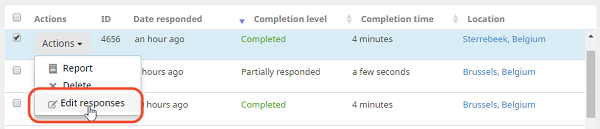
Go through the survey by clicking on Next. Any changes you make will be updated in real-time in your reports.
Removing responses
Click on Actions next to the respondent and click on Delete to remove the respondent from the survey.
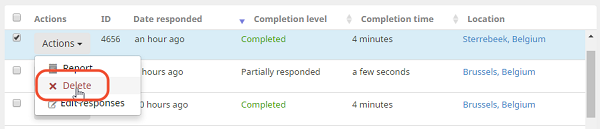
The respondent, including all of their answers, will be deleted from the survey. If the responses were from a contact, their status will change to Dropped.
Alternatively you can select multiple respondents and click on Delete to remove more than 1 respondent at the same time.
Leave a Reply